Scheduled Notifications
It's often useful to be able to schedule a notification on a regular basis, for example you might want to get a summary of out of stock items from your store every monday morning, or a list of sites that haven't successfully synced in the last 24 hours.
The scheduled reports plugin allows you to create reports like this.
Note: Right now, scheduled reports don't contain any conditional logic, so you can't create a report that only sends if there are out of stock items, or only sends if there are sites that haven't synced in the last 24 hours. This is something we may add in the future, or we may create another plugin that allows you to do this.
To configure a scheduled notification, go to Notifications and click New Notification.
Select Scheduled from dropdown, and assign a name to your notification.
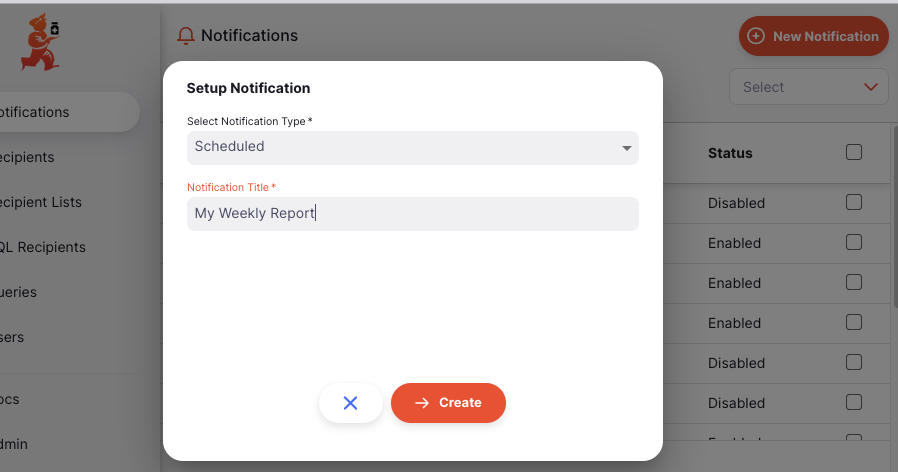
After clicking Create, you'll be taken to the edit page for your notification.
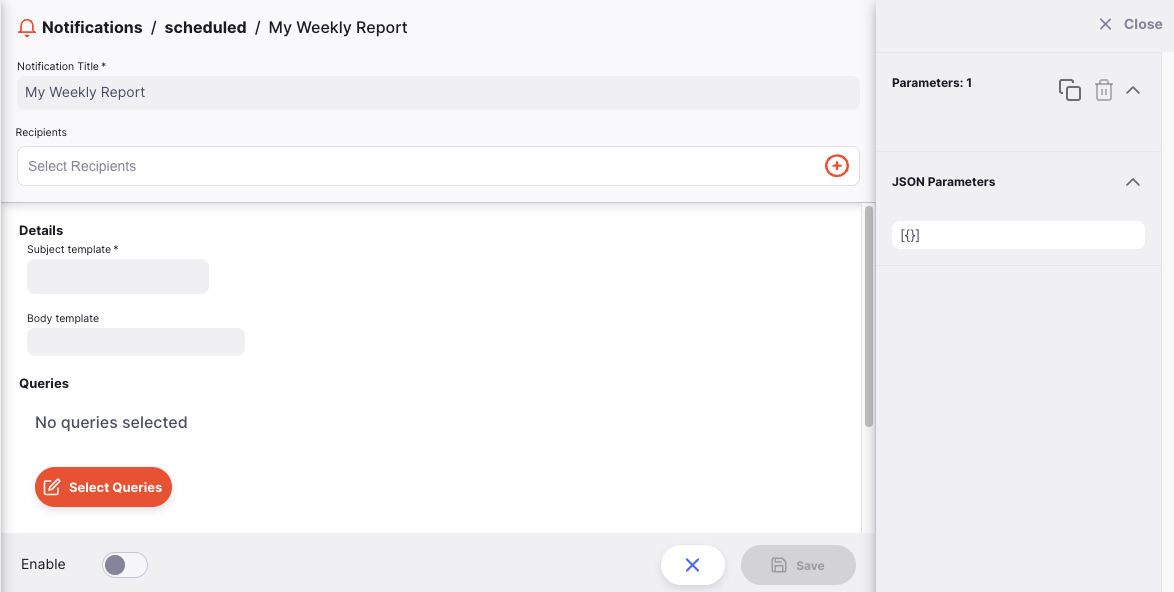
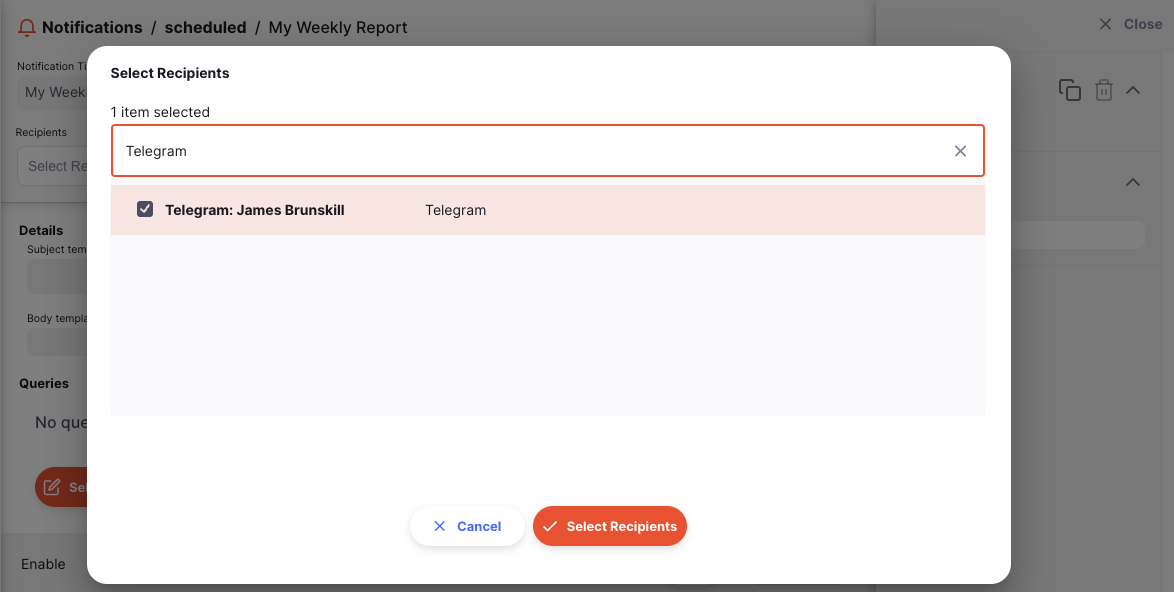
Selecting Recipients🔗
The first thing you'll need to do is select the recipients for your notification.
Click the box under the Recipients label to select the recipients, you can search for and select recipients, recipient, lists or sql recipient lists.
Basic Templating🔗
There are two templates for each scheduled report.
The first is the Subject template, currently is only used for the subject of the email that will be sent.
The second is the Body template, this is used for the body of the email and/or the text of the telegram message.
These templates are written using Markdown, and Tera templates.
As a very simple example, you could use the following template for the body of your email:
# Hello {{ recipient.name }}
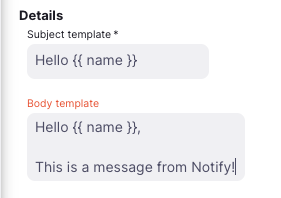
The system will replace {{ recipient.name }} with the name of the recipient, when sending the email or telegram message.

You can also use data from any associated queries in your templates, for example if you have a query called out_of_stock_items that returns a list of out of stock items, you could use a template like this to list them in the body of your email:
# Hello {{ recipient.name }}

Here are the items that are out of stock:
{% for item in out_of_stock_items %}
- {{ item.name }}
{% endfor %}
If your query returns only 1 row, you need to access the data using query_name.0.column_name, for example if you have a query with the number of sites that haven't syncd in the last 24 hours, you would need to use a template like this:
# Hello {{ recipient.name }}

{{ sites_not_synced.0.count }} sites have not synced in the last 24 hours!
Scheduling the Notification🔗
To schedule the notification, you need to set a Starting From datetime, and a Repeat Interval.
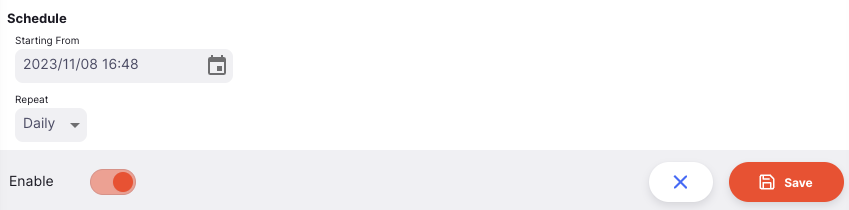
Starting From specifies the date and time that the first notification will be sent on.
The repeat interval can be set to Daily, Weekly or Monthly.
If Monthly is selected, and the Starting From date is the 31st of the month, the notification will be sent on the last day of every month, even if the month doesn't have 31 days.
To test the notification configuration, set the Starting From date 1 minute from now, Enable the configuration and click Save.
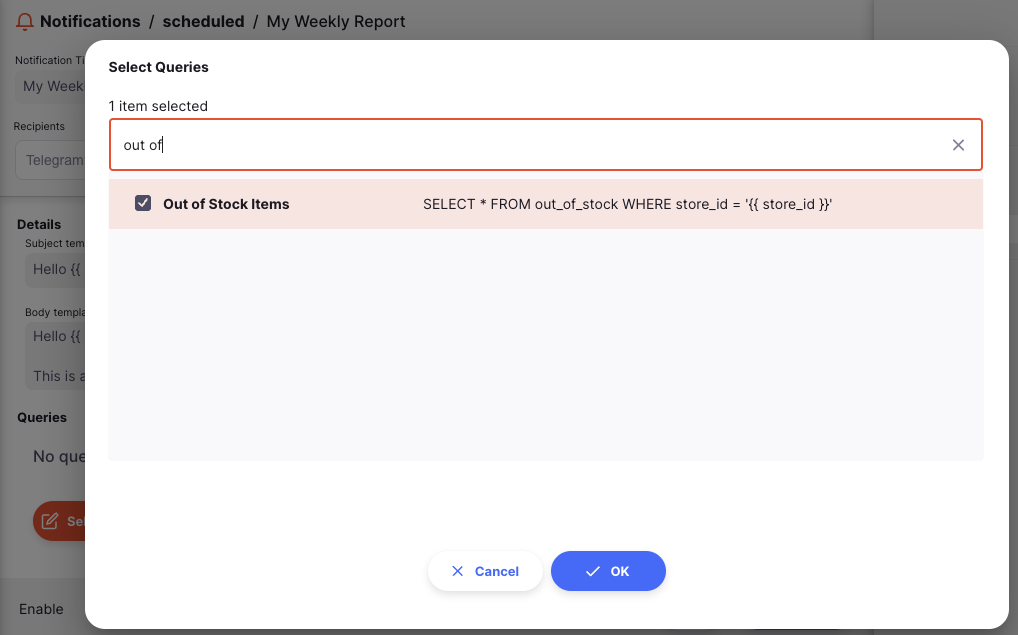
Configuring Queries🔗
If you have any queries associated with your notification, you'll need to configure them before the notification will work.
To configure a query, click the Select Queries button, and then choose the queries you want to run when the notification is sent.
To create new queries, you need to go the Queries page, and click New Query.
In this example, we have a query with a reference_name : out_of_stock_items that has a parameter called store_id.
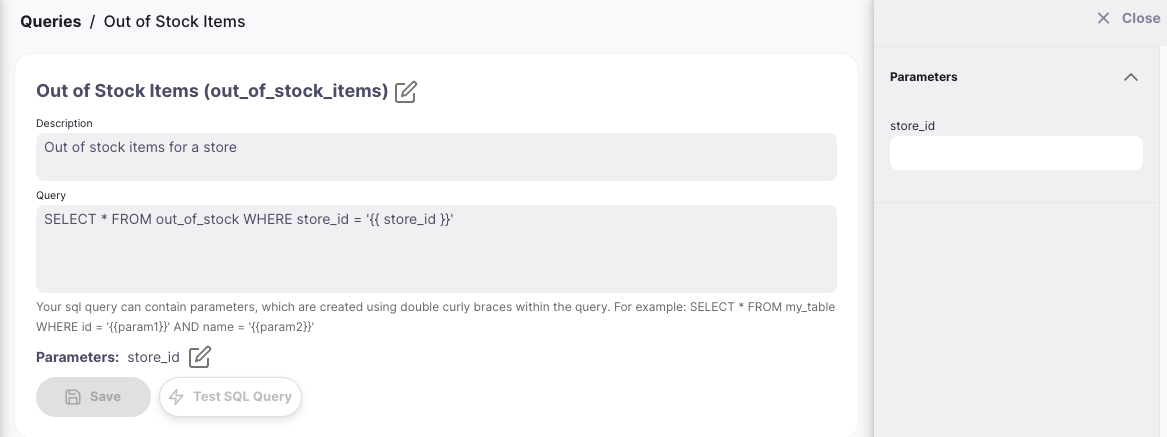
The data from each sql query is accessed using it's reference name, so in this case, we would access the data using out_of_stock_items.
If you only want your notification to be generated when a query returns data (e.g. more than 1 row) use the required check box.
This allows you to create conditional reports. For example you may only want to generate an out of stock notification if you have any out of stock items.

Parameters🔗
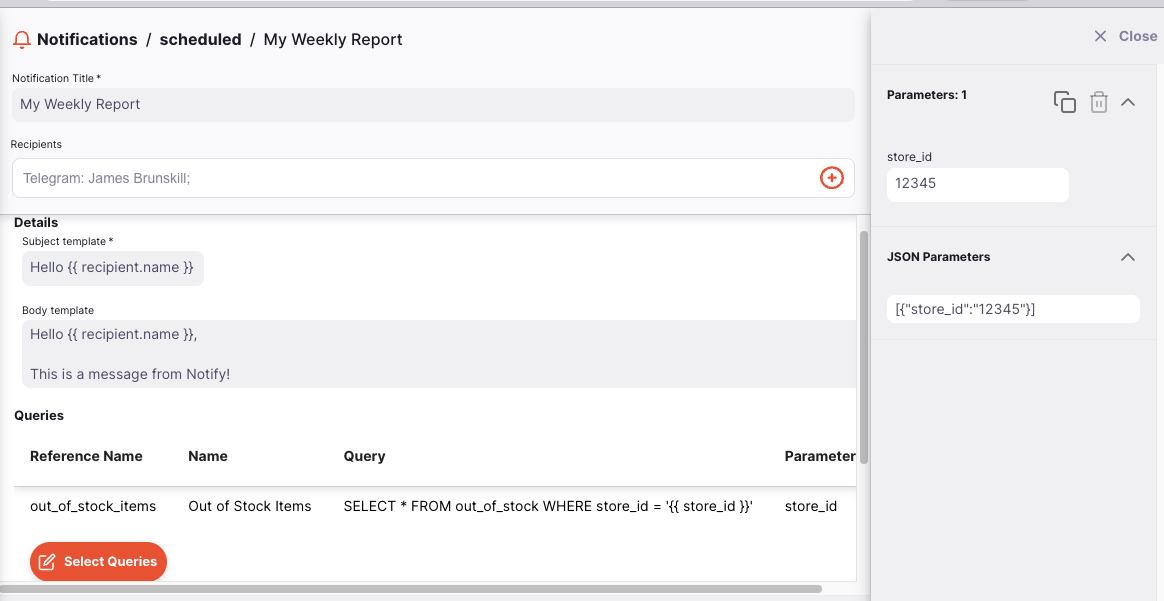
If the queries you've selected have parameters, you'll need to configure them before the notification will work.
Any required parameters for the queries you have selected will be listed under the Parameters tab.
If you want the notification to run multiple times, with different parameters, you can add multiple parameter sets.
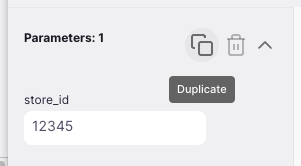
This can be done by clicking the duplicate button next to the parameter set.
If you have more than one parameter set, the notification will run once for each parameter set. This means if you setup a lot of parameter sets, you could end up with a lot of notifications being sent.
Note: Using SQL Recipients, you can control which recipients receive notifications for each parameter set.
Parameter sets can be entered by a parameter JSON object, this also allows you to add other parameters you might want to use in your templates.
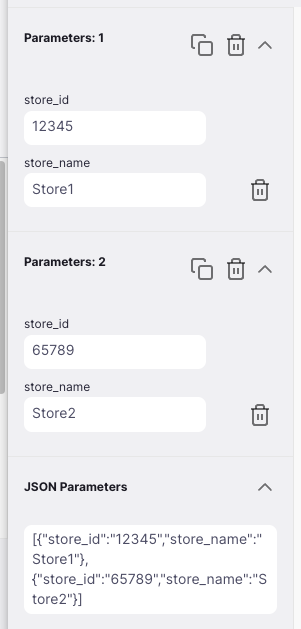
Parameters are accessed directly in a template, see {{ store_name }} in the example below:
# Hello {{ recipient.name }}

Here are the items that are out of stock at {{ store_name }}:
{% for item in out_of_stock_items %}
- {{ item.name }}
{% endfor %}
Note: if your query's reference name is the same as one of your parameters, the query will replace the parameter in the template, making it unavailable.
Hints🔗
- You can use a special variable
{{__tera_context}}to view all the data that is available in your template which can be useful for debugging. - If your sql queries fail to run, this can cause the whole notification to fail, check the
Notification Eventspage to see if there are any errors. - Telegram is really picky with what kinds of data it will accept, if you're having trouble sending a telegram message, there's some more information about the format of the data here.
- It's possible to do maths in your template if desired, see the tera docs for more information https://keats.github.io/tera/docs/#math
- If you want your notification to run conditionally, you can write a specific query that will only return rows when conditions are met, and mark this query as
required