Stocktakes
mSupply Mobile will automatically keep track of your stock levels for you, as you receive stock and give it out.
But sometimes data gets entered incorrectly or stock goes out without anyone making an entry in the system.
Of course, we try not to let that happen BUT, if it does happen, we can make corrections. The easiest way to correct mistakes is to do a Stocktake.
With mSupply Mobile, you can easily do a stocktake for:
- The full inventory; or
- A limited range of items (such as all your anti-malarials); or
- A single item (if you notice that the quantity on your shelves is wrong)
Stocktakes🔗
You should already be doing stocktakes with your current ordering systems.
Stocktakes are a very important way to ensure that the orders we are placing are accurate and that the stock will be correct if anyone checks!
Ideally, you should be doing a physical stocktake of each item EVERY time you place a main order but this depends on your local policies and procedures (and it may not be possible in larger facilities).
Let's learn how to do a stocktake. Using mSupply Mobile makes doing stocktake a lot easier than before!
Click on Stocktakes🔗
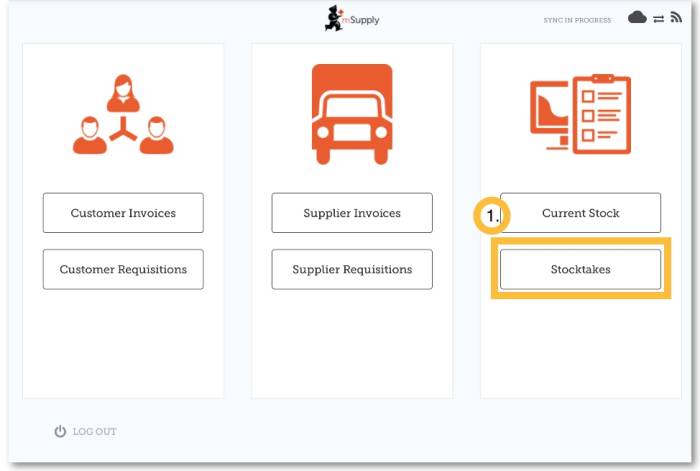
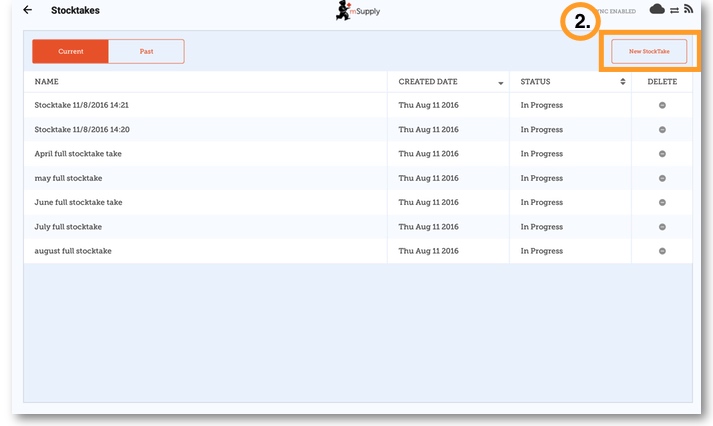
This brings up a list of all your previous stocktakes.
The description of each stocktake will be shown, with its Date and Status.
There are two stocktake statuses: In Progress (current) and Finalised (past).
In Progress stocktakes🔗
An In Progress stocktake is one you are still working on. If you want to keep working on an In Progress stocktake, double click on it.
We strongly recommend only having one In Progress stocktake at any time. This will prevent mistakes when moving between them.
Finalise or delete old stocktakes before starting new ones!
Start a New Stocktake🔗
Click on New Stocktake.
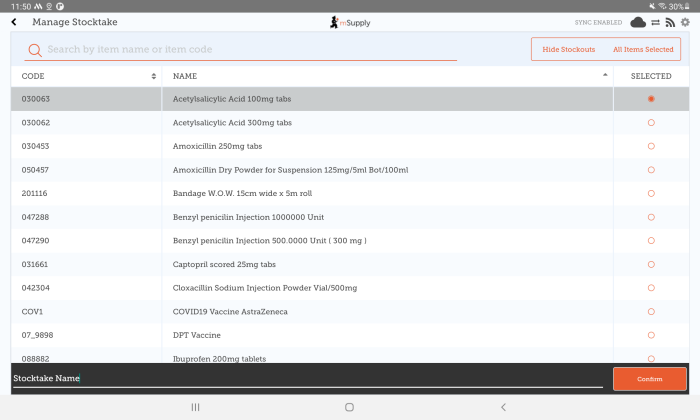
Select the items you wish to count.
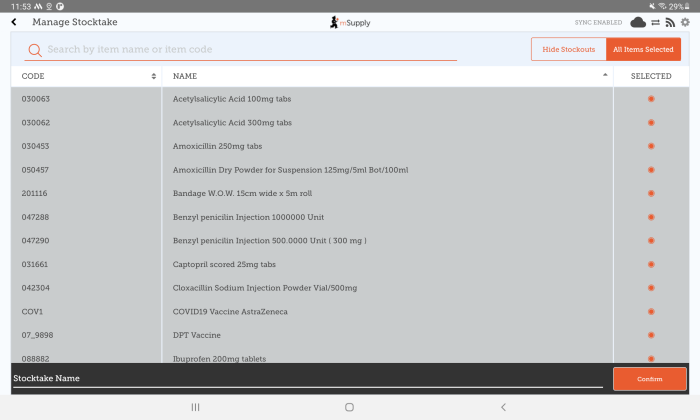
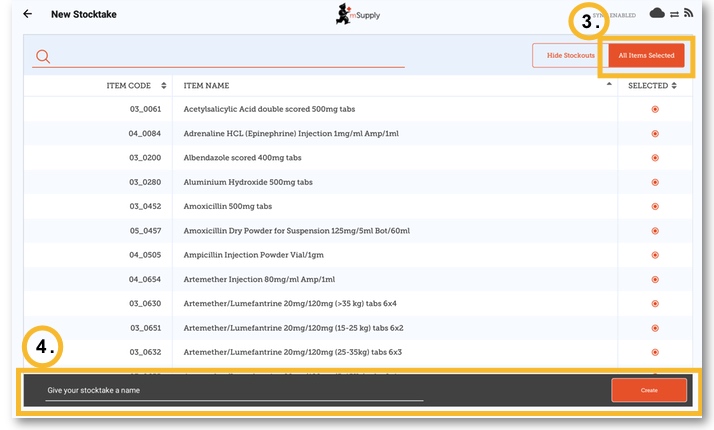
If you want to include every item or most items, select All Items Selected.
To hide items with 0 stock, select the Hide Stockouts toggle.
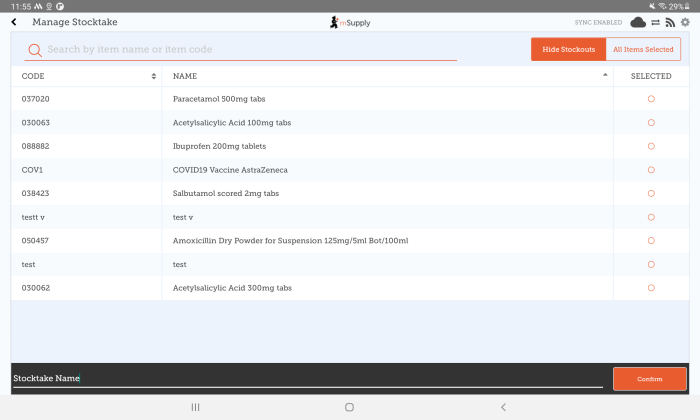
Give your stocktake a logical name🔗
For example, 'April Full Stocktake'.
Then click Create.
This will bring up the Stocktake Editor🔗
This lists each item (including Item Code, Item Name and Unit as set up in mSupply Desktop), its Snapshot Quantity and its Actual Quantity (from the physical count).
The Snapshot Quantity is what the system THINKS you have. If it is correct (when compared with your physical count), you don't need to do anything!
The Actual Quantity is what you have actually counted. You can change this by clicking in that column and typing in the correct quantity.
Note that Quantity in mSupply mobile currently refers to the actual quantity of an item (i.e. the number of units) and not the number of packs.
For each item, compare your physical count with the Snapshot Quantity🔗
Update incorrect item quantities by clicking in the Actual Quantity column.
If you change the amount of stock you have in the Actual Quantity column, this variation will now show in in the Difference column.
This can take some time but remember - if the Snapshot Quantity is correct, you don't need to do anything!

If prompted, enter a reason for inventory adjustments🔗
If your stocktake screen shows a Reason column, you must enter a reason for any positive or negative inventory adjustments.
As of v5.0.0 of mSupply mobile, the reason column is only displayed for stocktake batches and will not appear on the stocktake screen.
Options must be enabled for Stocktake Line Adjustments on the mSupply desktop server and synced to mSupply Mobile to enable reasons for inventory adjustments.
If the Actual Quantity entered is different from the Snapshot Quantity, you will be prompted to select a Reason for the Difference from a standard list. You will not be able to continue until a reason is selected.

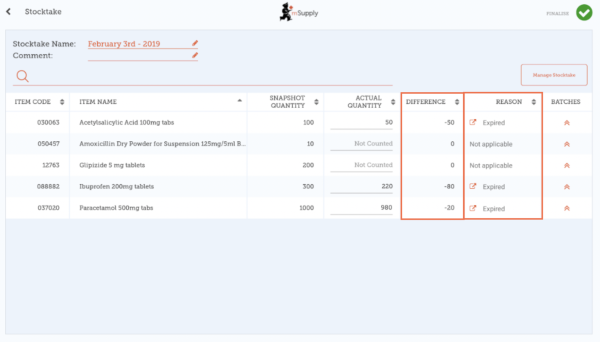
To change the reason, click on the cell again.
Edit batch-specific information🔗
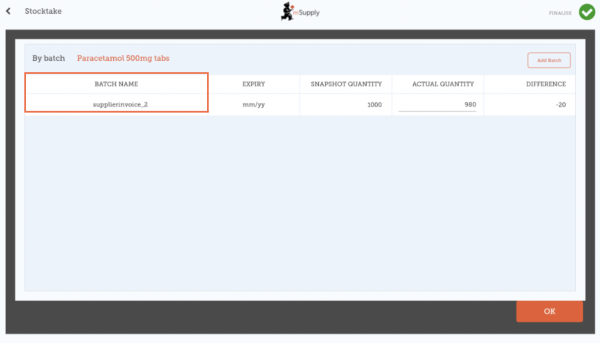
You can adjust batch-specific information or add new batches by clicking the item's Batches icon.
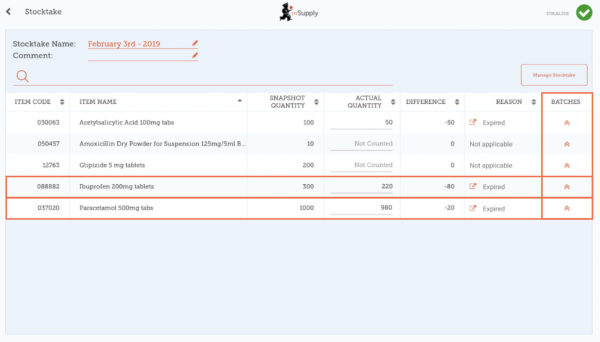
In this example there is only one batch of paracetamol.
If there are multiple batches:
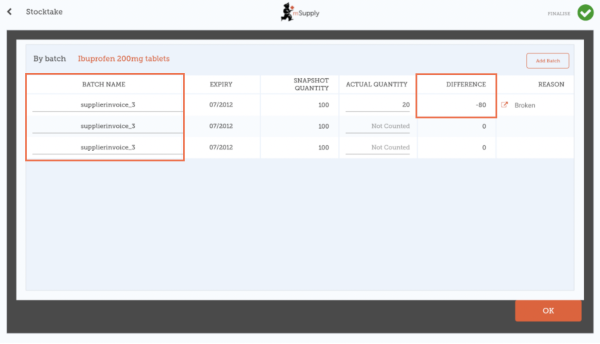
- Inventory adjustments will be automatically made to the batch that arrived first (i.e. first in - first out).
- In this example there are three batches of ibuprofen. The Snapshot Quantity was 300 and the Actual Quantity was 220. The Difference of 80 was automatically taken away from the batch that arrived first. However, this can be manually changed in this screen.
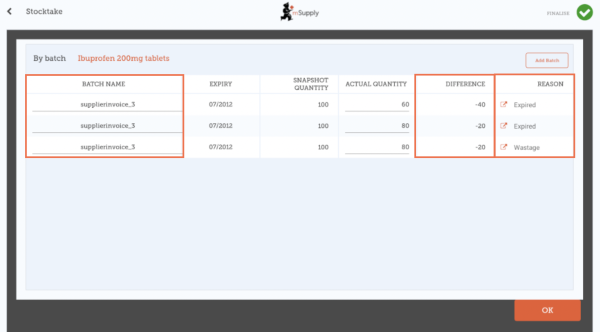
- The inventory adjustment reason selected will automatically apply to all batches.
- However, separate reasons for different batches can be manually changed in this screen. In this example we have updated the inventory adjustment of 80 among the batches of ibuprofen, with separate reasons for each batch.
When you are finished making changes in the Batches screen, click OK.
When you are finished🔗
Click Finalise.

This will update all your stock levels to match the quantities you have entered in the Actual Quantity column.
Like always with mSupply Mobile, you don't need to be connected to the internet to do this - the information will sync in the background when internet becomes available.