Store & Dispensing Setup
Server Setup: Configuring the Store & Dispensing Setting
Making items visible in the new store using Master List(s)🔗
- Click on the Master Lists tab and select at least one Master List. This will define which items are visible in the store.
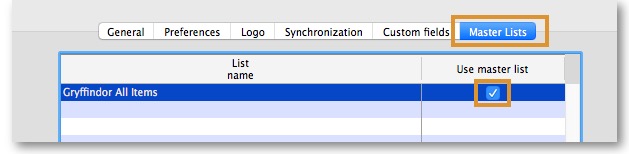
- Click OK
- Click OK again.
Make the Store visible to other Stores🔗
- Edit the 'name' associated with the Store and configure store visibility to other Stores appropriately
Setting up the correct synchronisation settings🔗
Since v4.12, sync settings are controlled by store visibility. You should not need to do anything described in this step.
If you have have used mSupply support to convert a customer into a store for you, and you have specified the sync site that the store will be Active on, then all you need to do here is:
- Change the Synchronisation type for this store on the Primary Server to Collector if so desired (normally the case)
- Configure this new store's Sync type to be Transfer or Active/Collector for any other sync sites that need to deal with this store.
- Edit store synchronisation settings (Special > Show Stores > Double-click on store > Synchronisation > Click to Unlock, enter code to edit):
- In the table below, in row of the Sync site that was created for this store, tick the tickbox in the Local column. This will automatically change the Sync type for that site to Active/Collector.
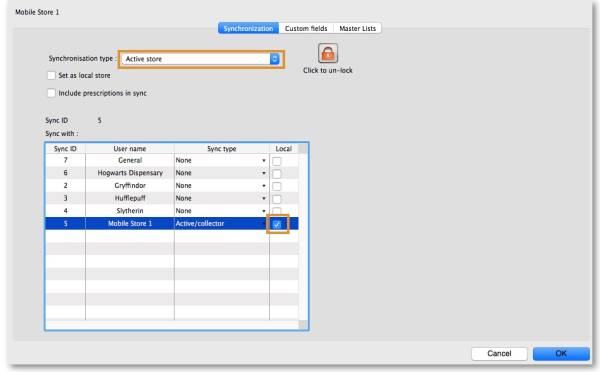
- Set Synchronisation type at the top to Collector
- Click OK
Custom settings🔗
These are set on the Custom fields tab of the store preferences in mSupply desktop (Special > Show Stores, Double-click on store > Custom fields tab).
| Setting name | Allowed Value(s) (Default value is in italics - this is used if preference is not configured) | Description |
|---|---|---|
| usesDashboardModule | true or false | Needs to be set to true if using the dashboard |
| usesVaccineModule | true or false | Needs to be set to true if using the vaccines module |
| usesCashRegisterModule | true or false | Needs to be set to true if using the cash register |
| usesPaymentModule | true or false | Needs to be set to true if handling cash payments. There are some (good!) side effects if this setting is true. |
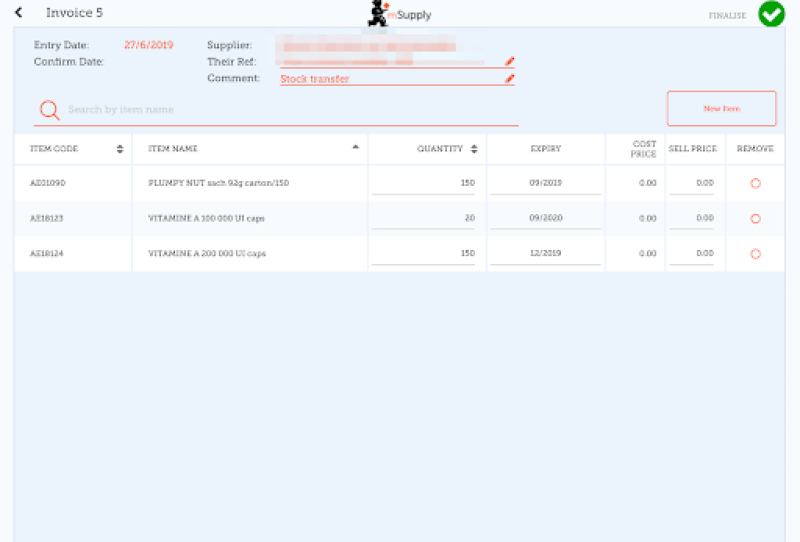
The sell and cost price columns are shown on Supplier Invoices and are also shown when editing batches in a stocktake where the sell price is editable.
See below for examples:
| Setting | Value | Comment |
|---|---|---|
| usesPatientTypes | true or false | If set to true then you can choose between Inpatient and Outpatient when dispensing. The data is stored in the transact.user1 field. Of course, usesDispensaryModule must be set to true for this to have any effect (see above) |
| monthsLeadTime | number (0) | The months of lead time - will be multiplied by 30 to use in mobile as months of lead time |
| monthlyConsumptionLookBackPeriod | number (12) | The number of months to look back when calculating average monthly consumption (AMC) |
| monthlyConsumptionEnforceLookBackPeriod | true or false | if True, then the full lookbackup period will be used, even if there is no consumption in those periods. We don't recommend this, but it's here to comply with the rules in some countries |
Other preferences🔗
You can set other preferences for mobile in the Store preferences by going to Special > Show Stores, Double-click on store > Preferences tab) in mSupply desktop:
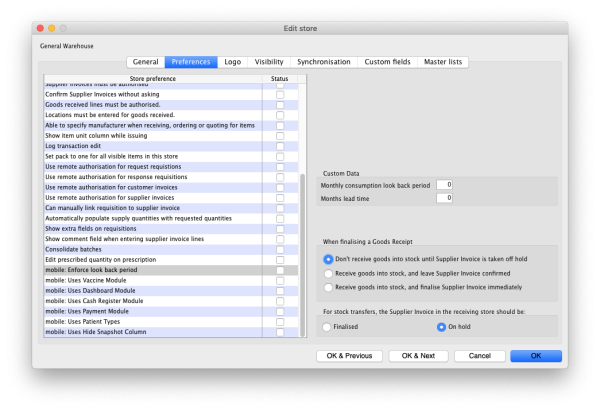
Here are the preferences and what they do:
| Preference | Description |
|---|---|
| mobile: Alert if a patient is dispensed the same vaccine multiple times in a week | Information coming soon! |
| mobile: Enforce lookback period | Information coming soon! |
| mobile: Uses vaccine module | Information coming soon! |
| mobile: Uses dashboard module | Information coming soon! |
| mobile: Uses cash register module | Information coming soon! |
| mobile: Uses Payment module | Information coming soon! |
| mobile: Uses patient types | Information coming soon! |
| mobile: Uses Hide Snapshot column | Information coming soon! |
Other configurations that then affect how mobile behaves🔗
| Item | Description |
|---|---|
| Programs | If you have a master list configured as a program, in mobile you will then be able to perform stock takes or supplier requisitions by program. |
| Reasons | If you have BOTH positive and negative inventory adjustments, have to apply a reason to stocktake lines with a difference = 0 |
| Prescription Categories | If you have transaction categories with type of "prescription" mobile will display a drop down list of prescription categories to select from |
| Insurance Providers | If you configured an insurance provider, then mobile will give you the ability to choose a policy, and to edit and create them at the end of a prescription |
| Payment Types | If you have configured any payment types, they’ll show up in a list at the end of a prescription |
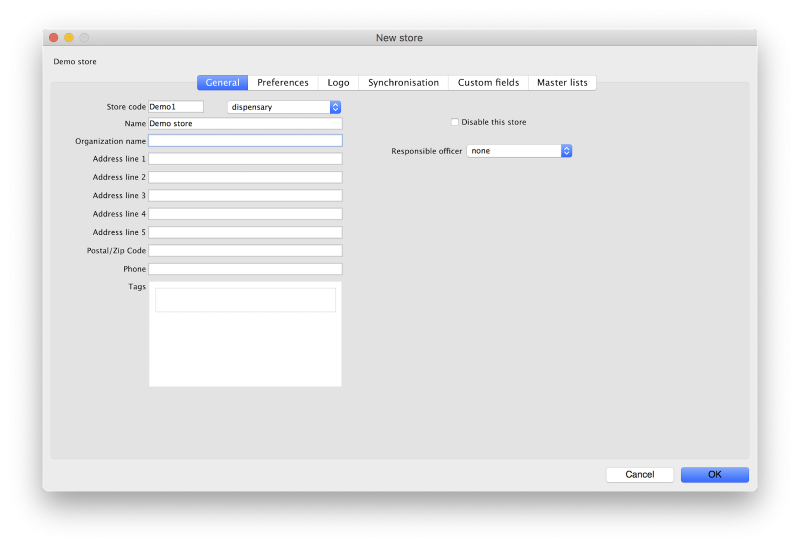
Dispensary mode🔗
- Ensure that your store is a Dispensary by choosing Dispensary from the drop-down list on the General tab of the store preferences.
- The mobile store needs to have the following field in Custom Fields for the dispensary to be visible in mobile
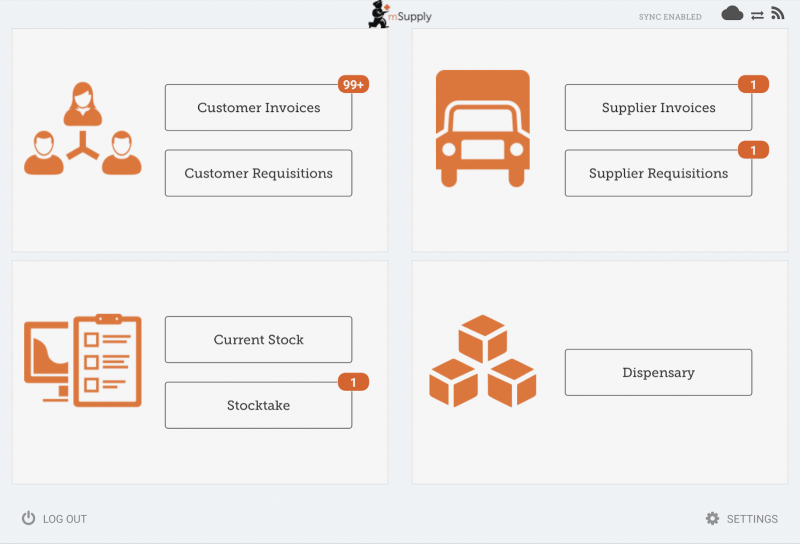
Of course you will need to synchronise mSupply mobile with the server before the mobile device receives these configuration settings. After sync, your Navigator window will look like this:
Vaccine dispensing🔗
If you want to use mobile for dispensing vaccines then see the setup instructions on the Vaccine Dispensing Setup page.
When the Payments module is on🔗
The cost and sell price are visible on supplier invoices:
The cost and sell price are visible when doing stocktakes:
