Customer Requisitions (Program Orders)
Program Orders from a Supplying Store
Usually, when a customer order stocks from you, they create a Supplier Requisition in their system. This will appear as a Customer Requisition in your system. You can also enter a manual customer requisition to record paper or phone orders from program customers.
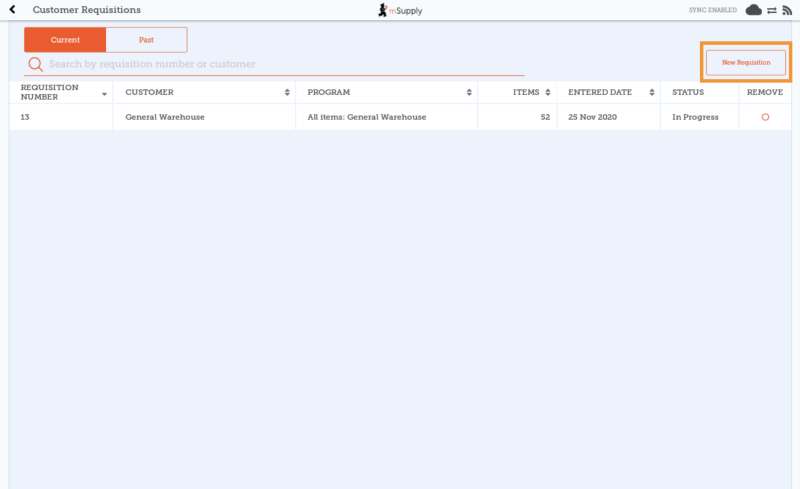
Tap Customer Requisitions > New Requisition
Select the Customer, Program, Order Type and Period🔗
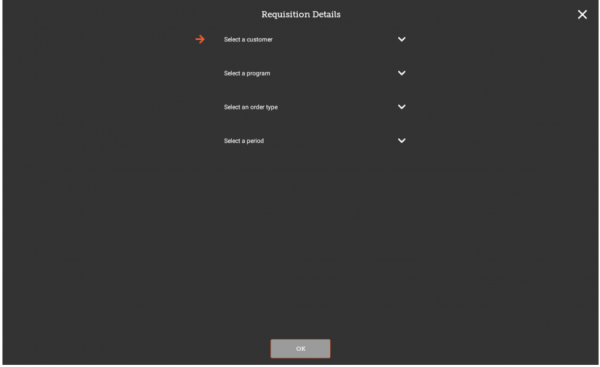
All of the fields in the Requisition Details window are compulsory.
The fields must be completed in the order they are displayed. The arrow points to which step you are up to and the tick shows which steps have been completed.
If you change your selection for a field, all of the subsequent fields will be reset.
For each of the fields, you can type the first letters of the name to limit the list to options starting with those letters.
See the programs section in the mSupply User Guide for information on how to set up programs, order types and periods for a customer.
Customer: a drop-down box appears with all of your customers (excluding patients).
Program: a drop-down box appears with all of the programs for the selected customer.
Order Type a drop-down box appears with the order types for the selected program. Further details for each order type are displayed on the right.
For non-emergency orders:
- Maximum orders per period: maximum number of orders that can be placed in a given period.
- Maximum MOS: maximum number of months' stock to be kept for each item.
For emergency orders:
- Max Items: maximum number of items allowed to be ordered for an emergency order (an alert will appear if the maximum number of items is exceeded).
- Maximum MOS: maximum number of months' stock to be kept for each item.
Period: a drop-down box appears with the available periods for the selected order type. When selecting period, further details are displayed on the right.
- Dates of the period: displayed as DD/MM/YY range.
- Number or requisitions already created: requisitions already created for the same customer, program, and period.
For non-emergency order types, if the maximum number of orders have been completed for a period, the period will not be displayed for selection.
Tap OK and review the customer requisition
The requisition is created and is populated with all program items.
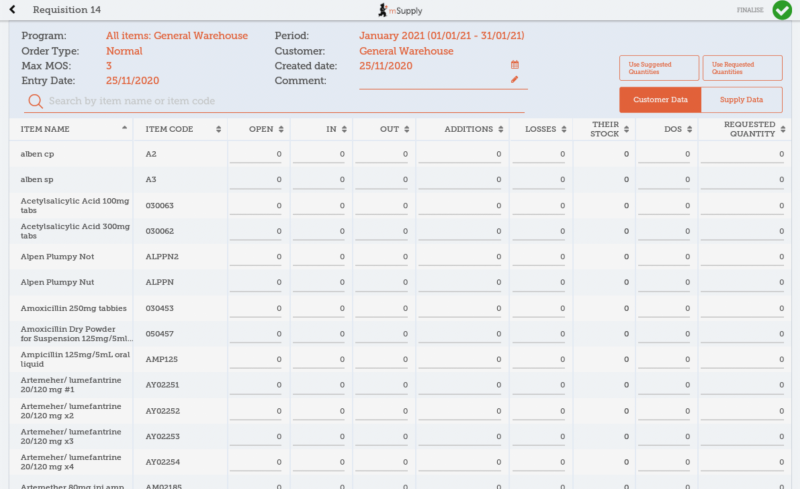
The items are displayed alphabetically. You can reorder the items by clicking on the column header for the category that you wish to order the items. Click on the same column again if you wish to reverse the order.
Editable cells are indicated by a line across the bottom of the cell. If you tap on any editable cell within the table, the data entry window will open in the bottom half of the screen and you can enter data using the number pad.
Data is saved automatically as it is filled in the table.
You cannot add additional items to a program customer requisition.
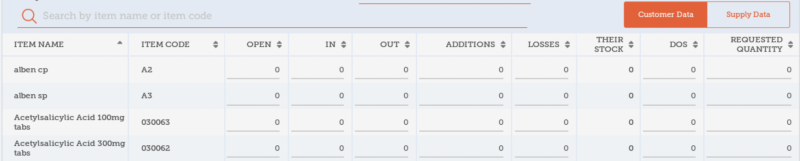
There are two sets of columns for data entry. The first is Customer Data which provides columns for entry of the customer requisition information. The second is Supply Data which provides columns for entry of the customer invoice information. You can switch between the two sets of columns using the buttons on the bottom right of the headers. Row order is identical across both sets of columns.
Entering customer data🔗
Tap on the cell that you wish to update:
Open: opening balance - this will be auto-filled with the closing balance from the previous period. However, this cell can also be edited if the opening balance is different.
In: quantity received - this will be auto-filled with the quantity supplied since the last customer requisition. However, this cell can also be edited if the quantity received is different.
Out: quantity consumed - editable cell for current period data.
Additions: editable cell for current period data.
Losses: editable cell for current period data. Note that mSupply will automatically subtract the values in the losses column from stock quantities. You do not need to enter negative values.
Their Stock: closing balance - calculated as closing balance= opening balance+quantity received-quantity consumed+additions-losses.
DOS: days out of stock - editable cell for current period data.
Requested Quantity: editable cell for current period data.
For cells that have a calculated value, tap on the item code or name and a window will appear at the bottom of the screen that shows the calculation for the item.
Entering supply data🔗
Tap on the cell that you wish to update:
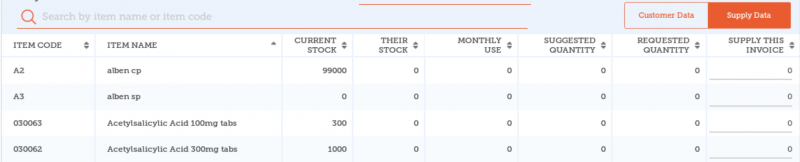
Current Stock: this will be auto-filled with your current quantity of stock for this item.
Their Stock: this will be auto-filled with the customer’s closing balance (from the customer data column).
Monthly Use: calculated as average monthly consumption=(outgoing stockaverage number of days a month)/(days in period-days out of stock)*.
Suggested Quantity: calculated as suggested quantity=(monthly consumptionmonths to supply)-stock on hand*.
Requested Quantity: this will be auto-filled by the quantity requested by the customer (from the customer data column).
Supply this Invoice: editable cell for the current time period. You can also use the auto-fill buttons in the header:
- Use Requested Quantities: auto-fills the supply this invoice column for all items with the value from the requested quantity column.
- Use Suggested Quantities: auto-fills the supply this invoice column for all items with the value from the suggested quantity column.
Selecting either of the auto-fill buttons will overwrite all values in the supply this invoice column.
Finalising a Customer Requisition🔗
When you are completely sure that everything is correct, tap the Finalise button, then Confirm. Finalising the requisition will also generate a finalised customer invoice.