Outbound Returns
Outbound Returns can be used to return stock to a supplier.
It is important to be able to return goods to a supplier without it being counted as goods being issued to a customer. If you just issue goods to your supplier through an Outbound Shipment, then those goods will be counted as part of your store's 'issuance' (consumption). An Outbound Return is the right way to return goods to a supplier.
If you have used mSupply in the past, you may be familiar with the term Supplier Credit instead of Outbound Return.
Viewing Outbound Returns🔗
Open the Outbound Returns Menu🔗
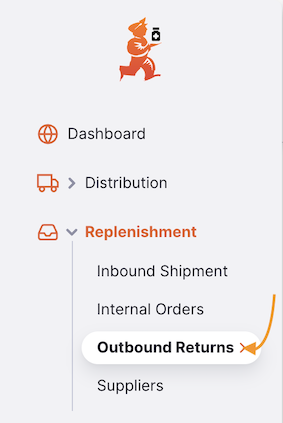
Choose Replenishment > Outbound Returns in the navigation panel.
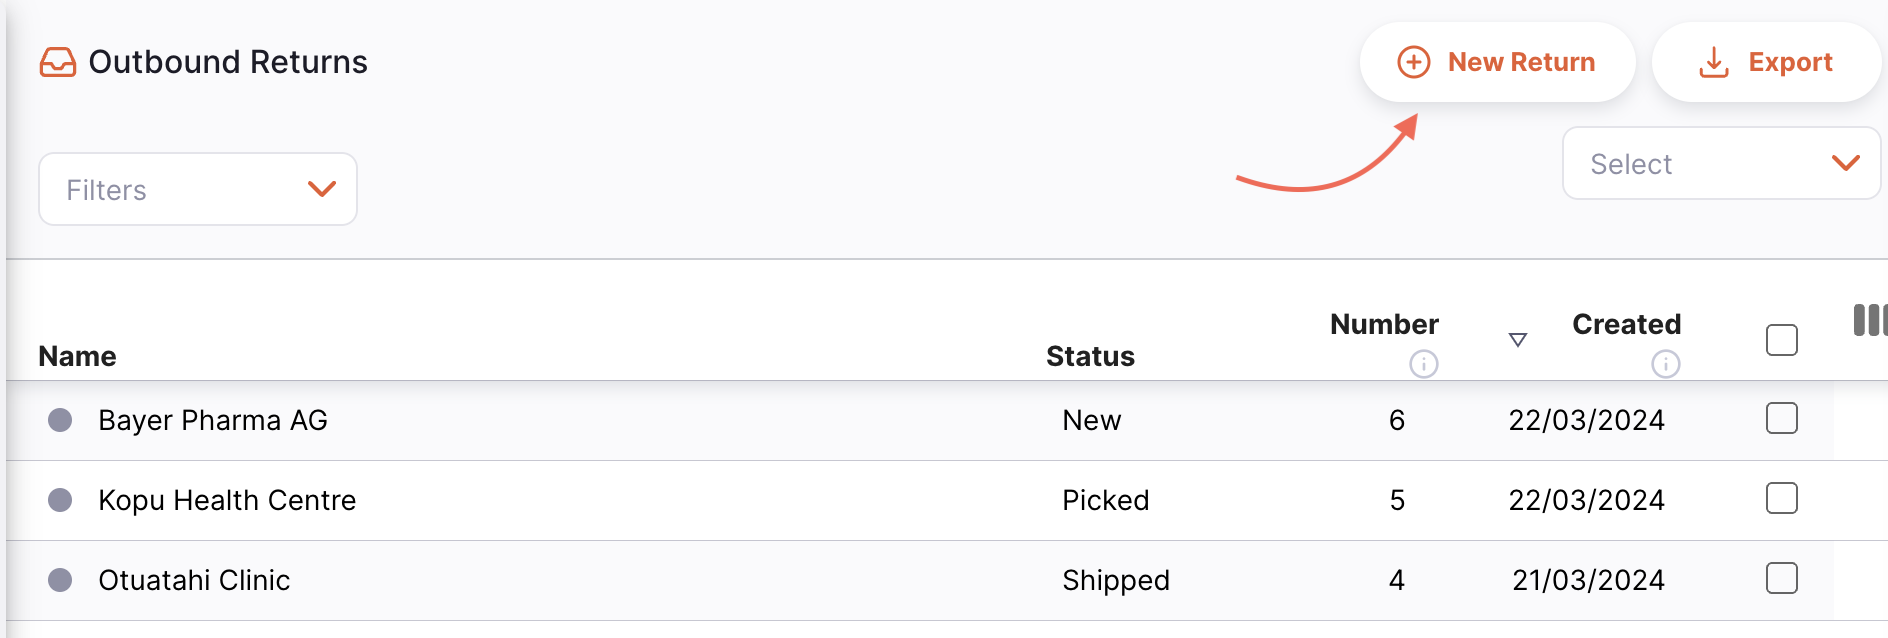
You will be presented with a list of Outbound Returns (if you don't see any, you are probably just starting!).
From this screen you can:
- View a list of Outbound Returns
- Create a new Outbound Return
- Export Outbound Returns to a
.csvfile
Outbound Return list🔗
- The list of Outbound Returns is divided into 6 columns:
| Column | Description |
|---|---|
| Name | Name of the Supplier |
| Status | Current Status of the return |
| Number | Reference Number of the return |
| Created | Creation date of the return |
| Reference | Supplier reference |
| Comment | Comment for the return |
- The list can display a fixed number of returns per page. On the bottom left corner, you can see how many returns are currently displayed on your screen.
- If you have more returns than the current limit, you can navigate to the other pages by tapping on the page number or using the right of left arrows (bottom right corner).
- You can also select a different number of rows to show per page using the option at the bottom right of the page.

Search by Supplier Name🔗
You can filter the list of returns by supplier name or by status. This can be useful if you're looking for one particular return!
Select the Name filter from the list to filter by the supplier name:
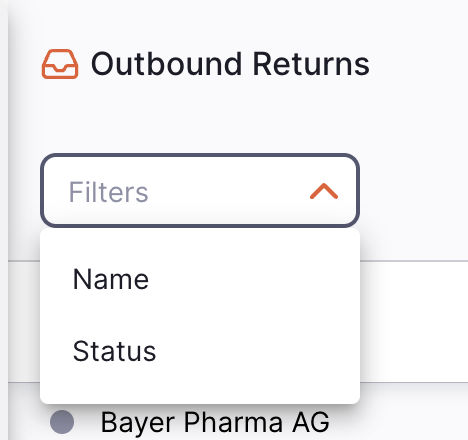
Type the name of a supplier in the Name field. All the returns for this supplier will appear in the list.
Exporting Outbound Returns🔗
The list of Outbound Returns can be exported to a comma separated file (csv). Simply click the export button (on the right, at the top of the page)
and the file will be downloaded. The export function will download all Outbound Returns, not just the current page, if you have more than 20 of them.
Delete an Outbound Return🔗
You can delete a return from the Outbound Return list.
-
Select the return that you want to delete by checking the box on the left end of the list. You can select more than one return to be deleted. You can even select them all using the master checkbox in the list headers.
-
Open the
Selectdropdown (top right corner, above the list) and selectDelete selected lines. -
A notification confirms how many returns were deleted (bottom left corner).
SHIPPED.
Creating an Outbound Return🔗
Create from Inbound Shipment🔗
Often, you will be returning goods that you received via an Inbound Shipment. In this case, you can create an Outbound Return from the Inbound Shipment itself.
Create manually🔗
-
Go to
Replenishment>Outbound Return. -
Press the
New Returnbutton, in the top right corner
- A new window
Suppliersopens, inviting you to select a supplier.
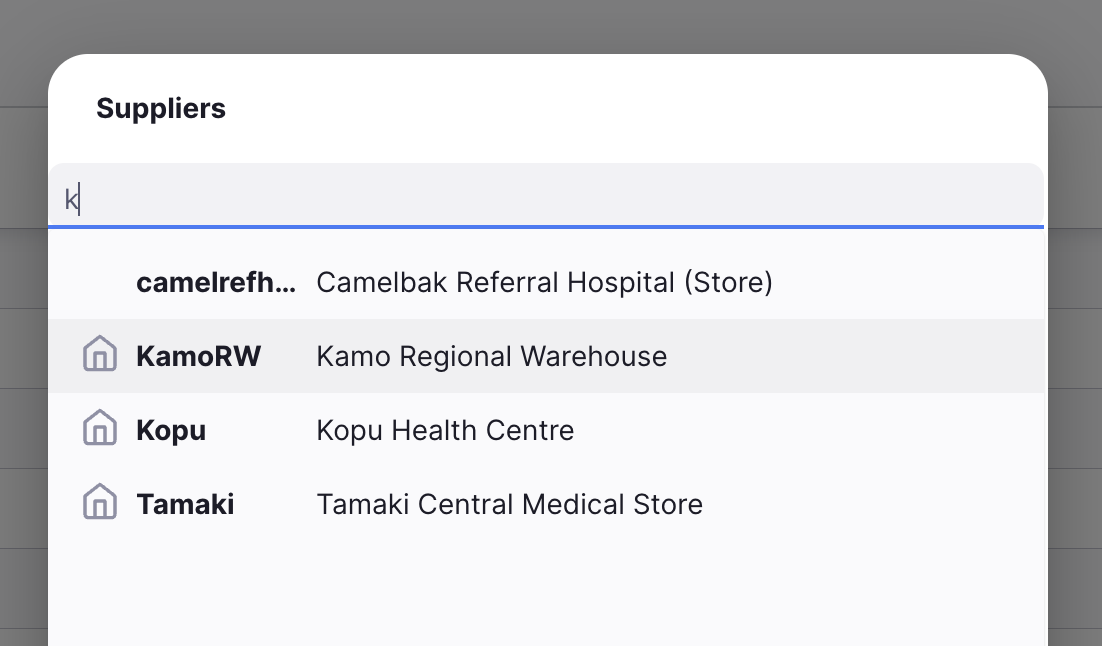
Select a Supplier🔗
- In the
Supplierswindow, you will be presented with a list of available suppliers. You can select your supplier from the list or you can type as much of a supplier name as you want.
 next to the supplier code.
- Once you tap or press
Enter, or click on a supplier, your Outbound Return is automatically created
NEW
Enter a Supplier Reference🔗
Once your Outbound Return has been created, you can enter a supplier reference in the Reference field, if they have one (eg. PO#1234567)
View or edit the Outbound Return Information Panel🔗
The Information Panel allows you to see or edit information about the Outbound Return. It is divided into multiple sections:
- Additional Info
- Related Documents
- Transport Details
We are planning to add more sections in the future as Open mSupply grows.
How to open and close the Information Panel?🔗
If you are using a large screen, the information panel will be automatically opened for you. However, on an average sized screen, the information panel will be closed by default.
To open the Information Panel, you can tap on the More button, located in the top right corner of the Outbound Return view.
You can close by tapping on the X Close button, on the top right corner of the information panel.
Additional Info🔗
In the Additional Info section, you can:
- See who created the Outbound Return (name of the user)
- View and edit the Outbound Return color. To edit the color, tap on the coloured circle and select a color from the pop-up
- Write or edit a comment
Related Documents🔗
In the Related Documents section, you can see other related transaction documents for the Outbound Return.
If your Outbound Return was created from an Inbound Shipment, the reference number of the Inbound Shipment would appear in this section.
In the future, we would also include other documents such as transportation documents or pick slips.
Transport Details🔗
In this section, you can see or edit a transport reference number (eg. a booking or a tracking reference number).
Actions🔗
- Delete: You can tap on the
Deletebutton to delete the return. You can only delete Outbound Returns if they have not beenSHIPPED. - Copy to Clipboard: You can tap on the
Copy to Clipboardbutton to copy the invoice details to the clipboard.
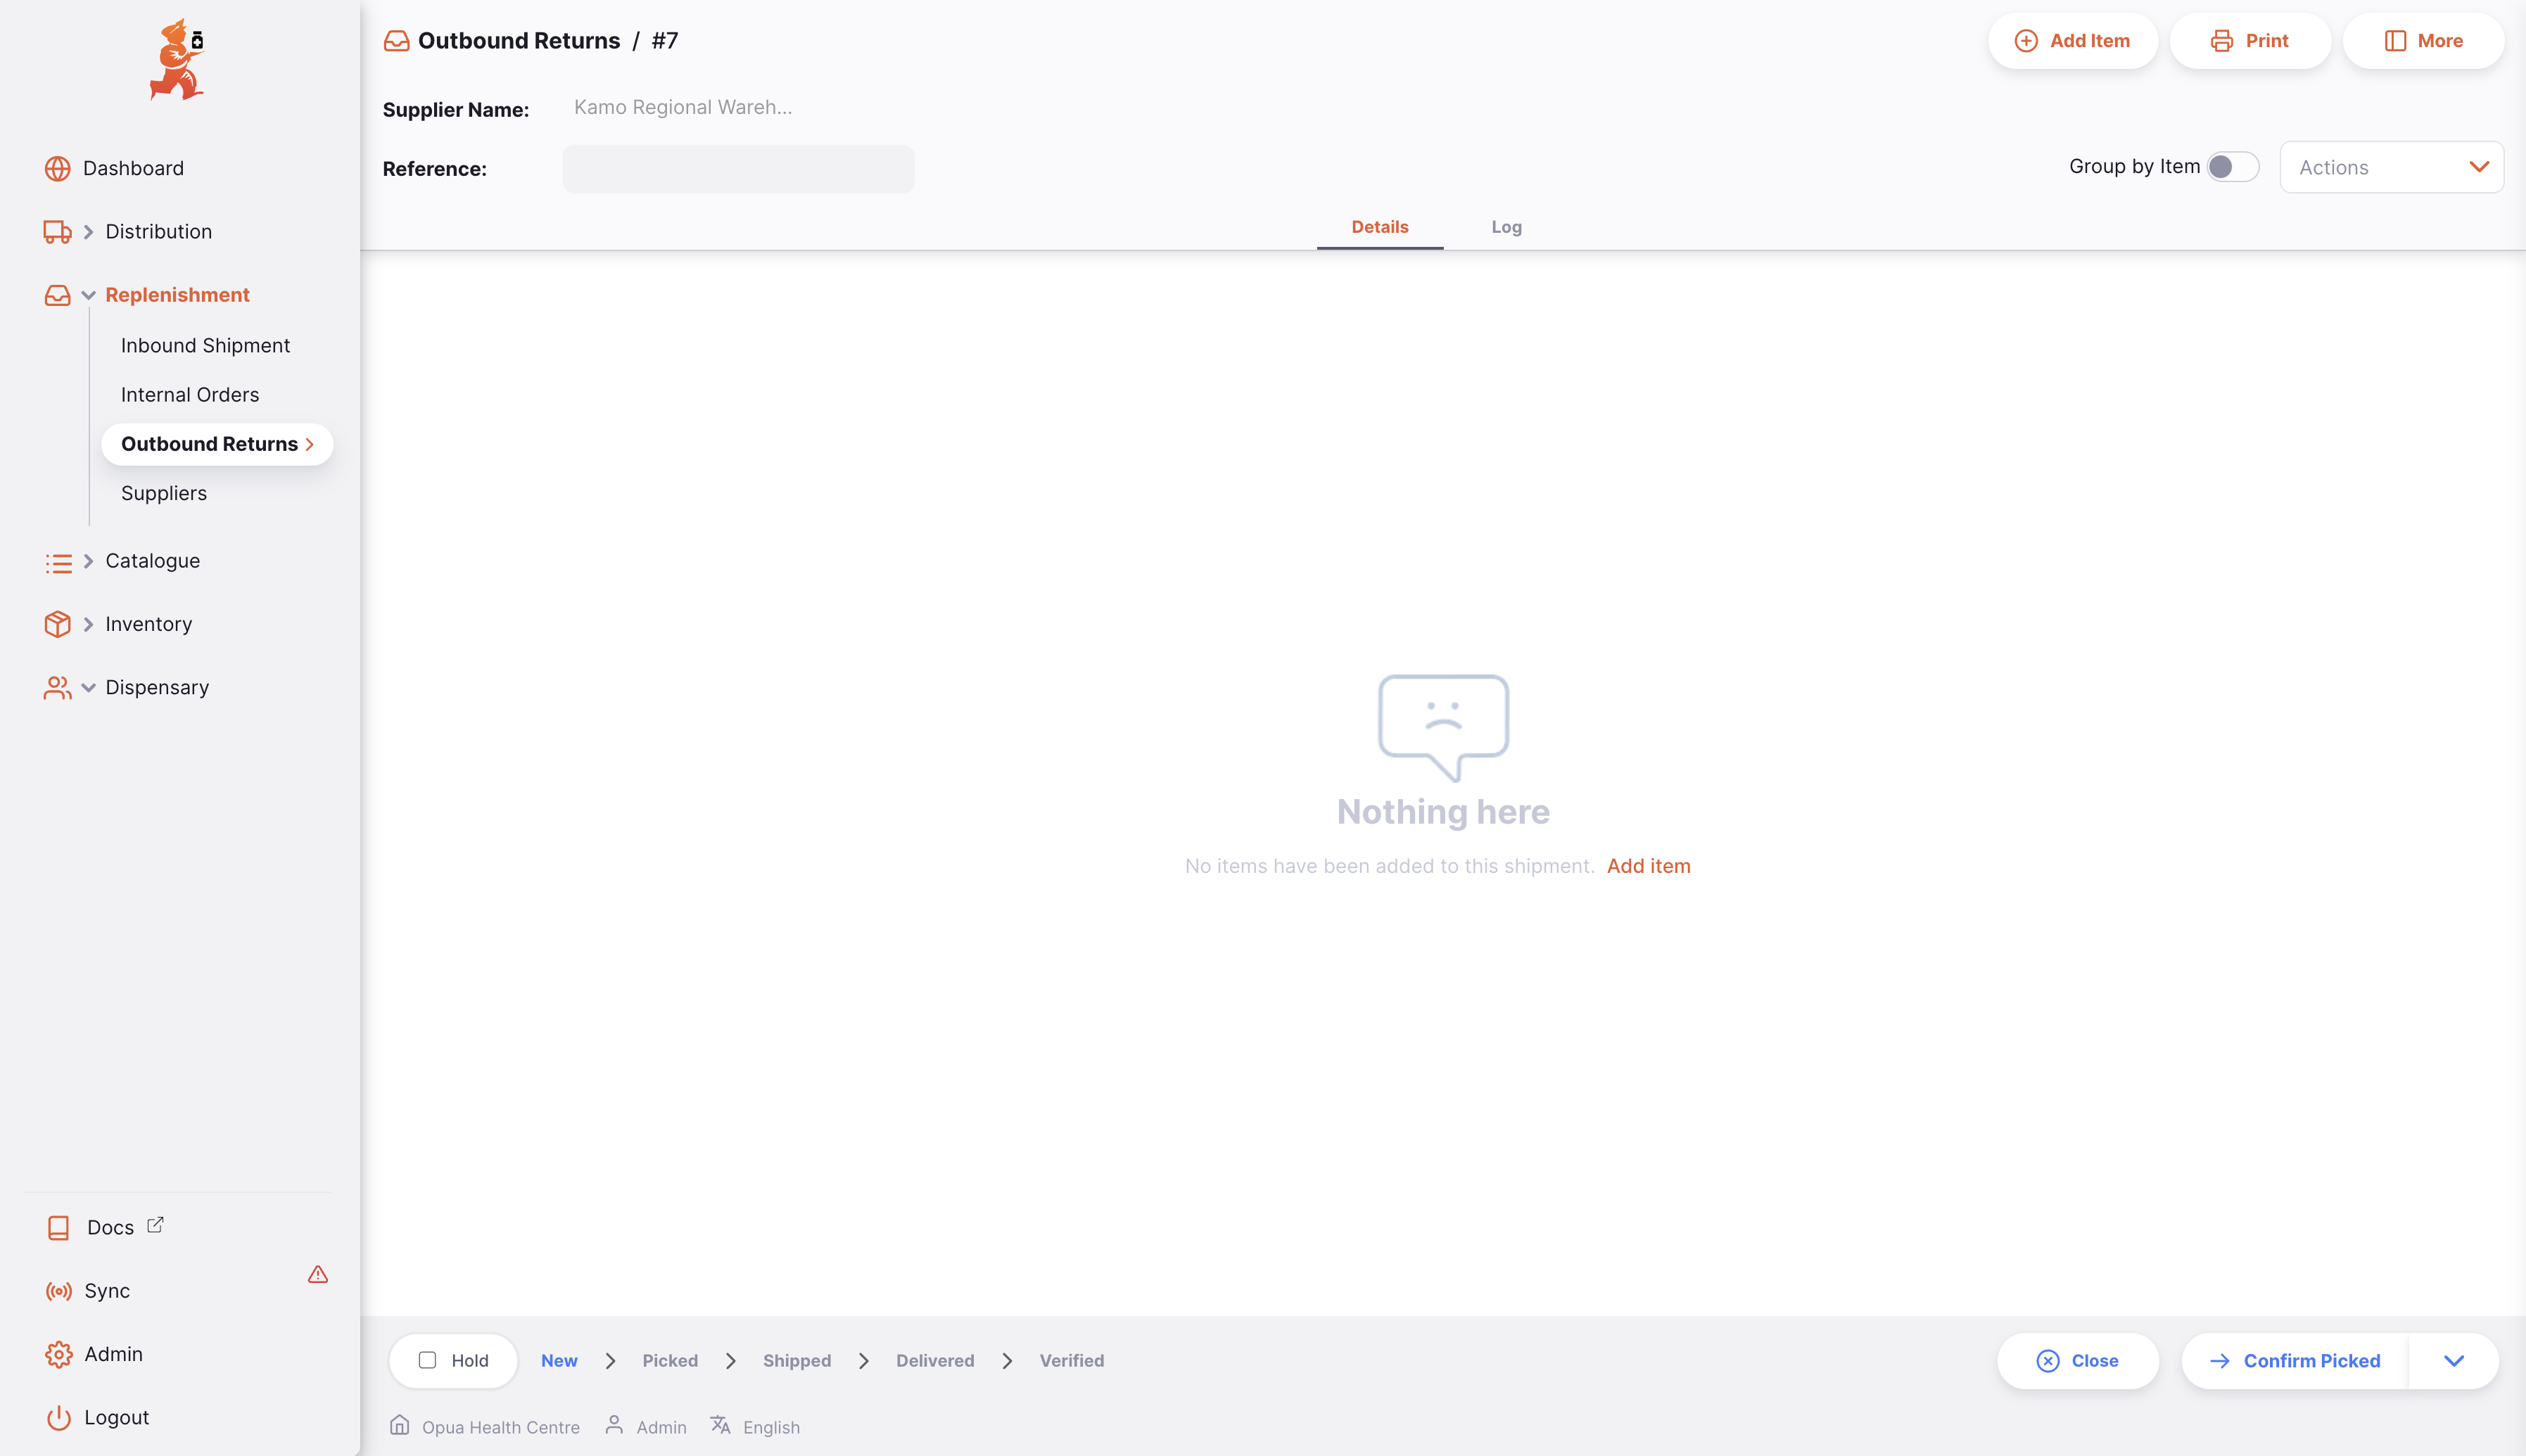
Outbound Return Status Sequence🔗
The status sequence is located at the bottom left corner of the Outbound Return screen.
Passed statuses are hightlighted in blue, next statuses appear in grey.

NEW.
SHIPPED.There are 5 status for the Outbound Return:
| Status | Description |
|---|---|
| New | This is the first status when you create a return. Goods are reserved (no longer available for other shipments) but are still part of your inventory. |
| Picked | Return is picked and is now ready to ship. Goods are no longer part of your inventory. |
| Shipped | Return has been shipped |
| Delivered | Your supplier has received the return |
| Verified | Your supplier has verified the quantity of the return. Goods are now part of their inventory. |
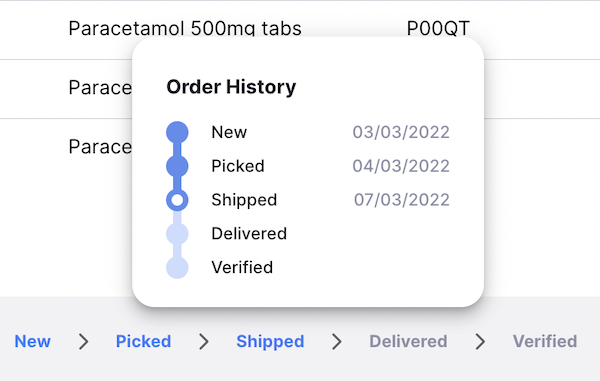
If you hover over the status sequence, a return history window appears. You can see the date when a return was updated from one status to another.
Hold checkbox🔗
Located on the bottom left corner, on the left of the status sequence.
Checking the Hold checkbox prevents the Outbound Return from being updated to the next status.
Close and Confirm button🔗
Close Button🔗
Tap on the Close button to quit the Outbound Return view and return to the Outbound Returns list.
Confirm Button🔗
The Confirm button updates the status of a return. The status which you can confirm depends on the current status of the return and follows the sequence shown below.
When managing an Outbound Return, you can only confirm the Picked and Shipped statuses.
| Confirm... | Current Status | Next Status |
|---|---|---|
| Confirm Picked | New | Picked |
| Confirm Shipped | Picked | Shipped |
You don't have to update a return to the next status in the sequence. You can choose to skip Picked to go directly to Shipped for example.
As demonstrated below, tap on the down arrow of the Confirm button and select the status you want the return to be updated to.
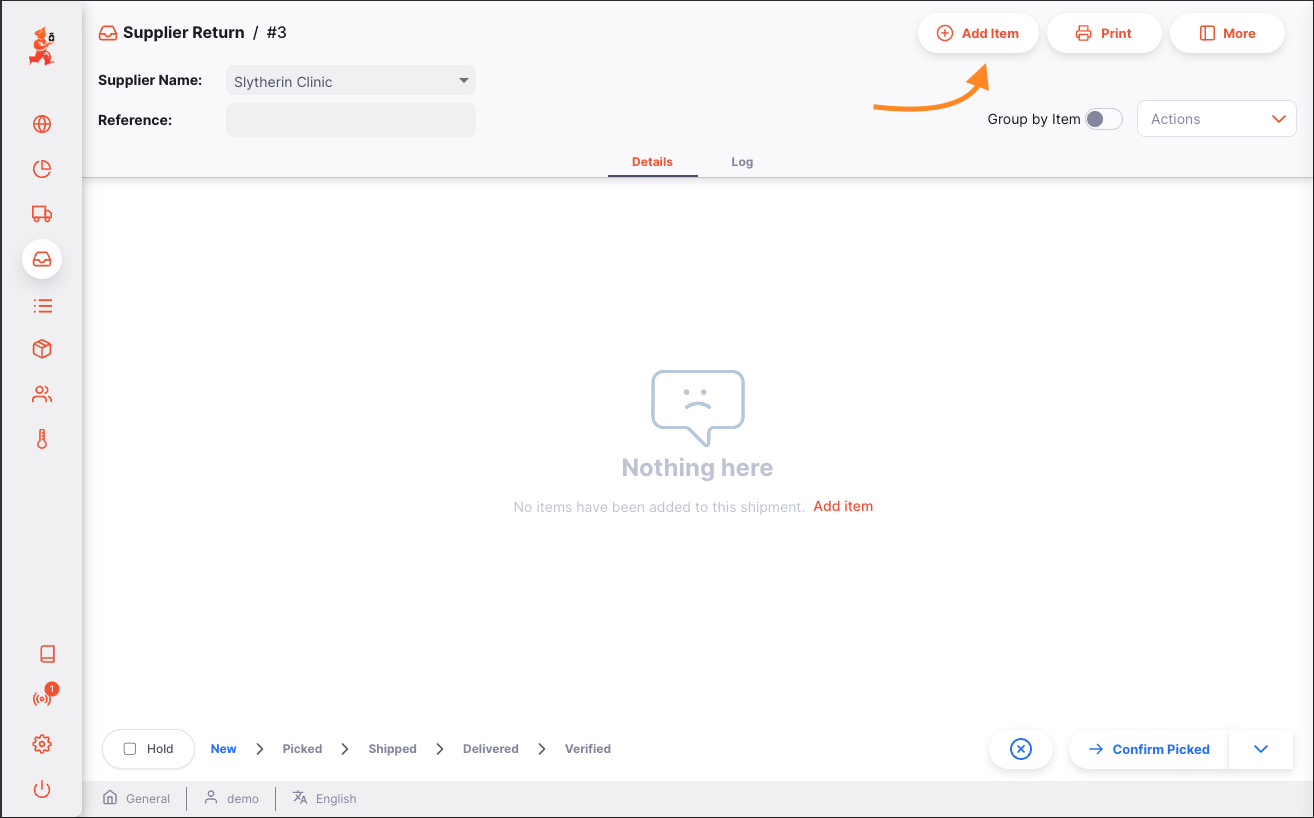
Adding lines to an Outbound Return🔗
Tap on the Add Item button (top right corner).
A new Add Item window opens.
Select an Item🔗
In the Add Item window, you can look up an item by:
- Reading through the list of available items
- or by typing some or all of the item name
- or by typing some or all of an item code
Once your item is highlighted, tap on the name or press Enter.
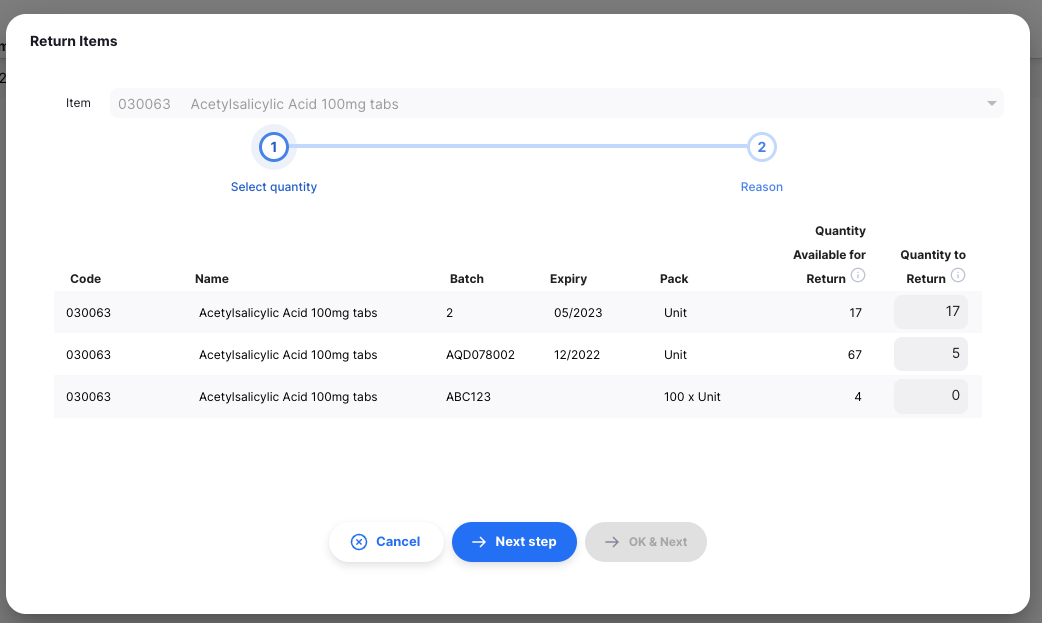
List of available batches:🔗
This is a list of batch numbers that you have in store for this item:
- Code: Item code
- Name: Item name
- Batch: Batch number. It is a designation given to products made in the same manufacturing run.
- Expiry: Expiry date of the batch (format: MM/YYYY)
- Pack: Number of units per pack
- Quantity Available for Return: Number of packs available (not already allocated to other shipments or returns)
- Quantity to Return: Number of packs to be returned

Return a quantity of packs🔗
As you can see above, initially the quantity of packs to return from each batch will be 0. You can adjust this to return some or all of the available stock in that batch.
Warnings🔗
You may see one or more warning messages on this screen:
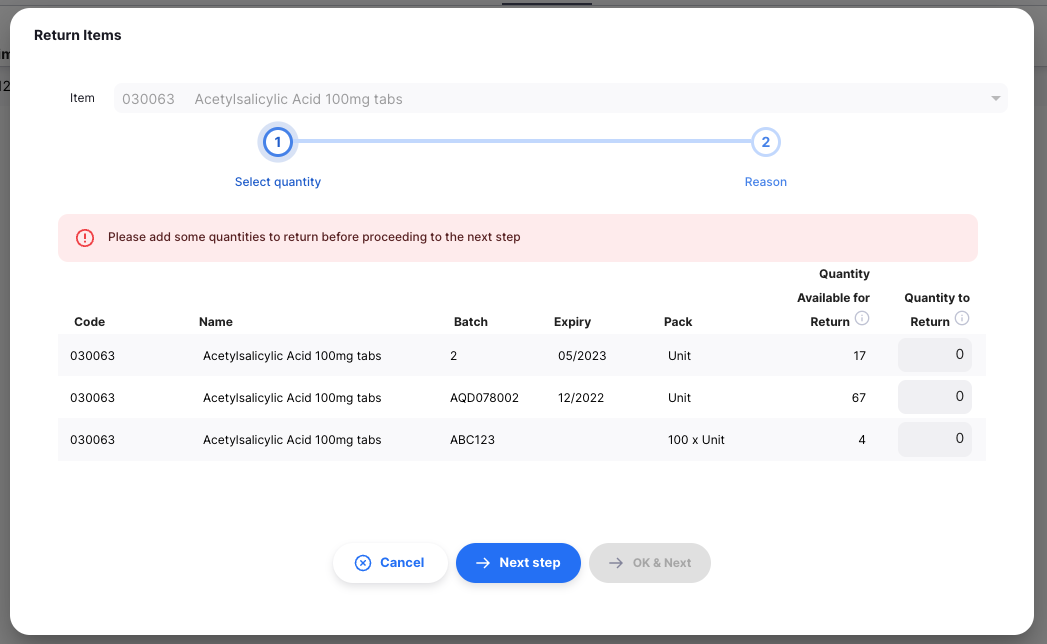
If you forget to enter a quantity to return for any batch and click Next step, you will see this warning message. You'll need to add a quantity to return from at least one batch. You can click Cancel if you no longer want to return any of this stock.
Provide Reasons🔗
Return reasons are configured on the mSupply central server via options
When you are happy with the quantities, you can press the Next step button. The list of batches will be filtered to only include the batches you set a return quantity for. In this view, you can provide a reason for returning each batch, and an additional comment.
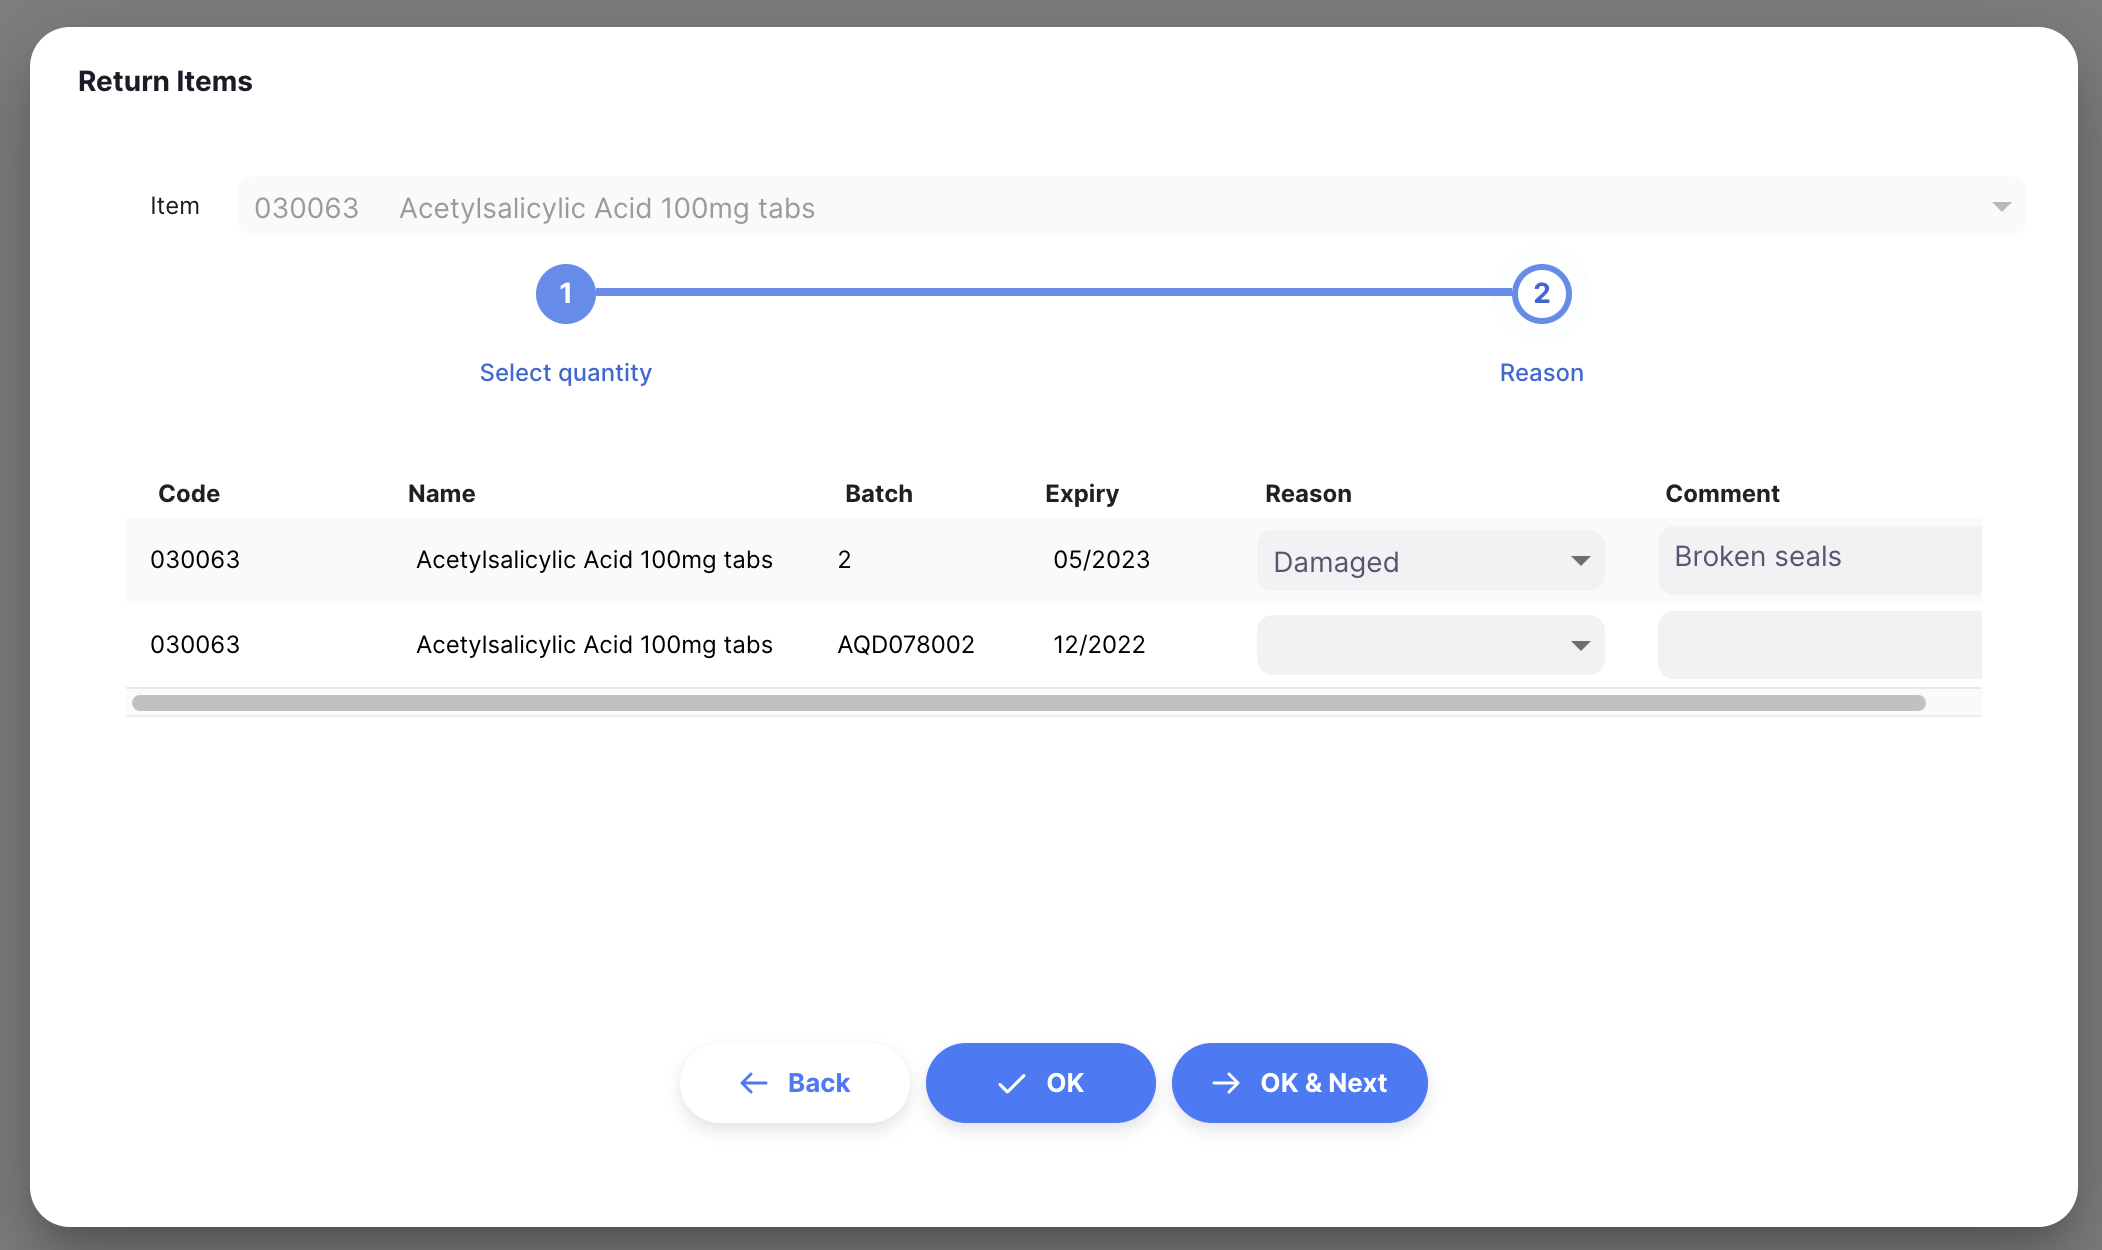
Confirm🔗
When you are happy with the quantities and reasons, you can press on:
- the
OKbutton. Your item will be added to the Outbound Return. The quantities for each batch will be reserved for this return. - the
OK & Nextbutton to add another item right away - the
Backbutton, to go back to theSelect quantitystep
Editing an Outbound Return Line🔗
To edit a return line, tap on it. You will be presented with the Edit Item window, which is identical to the Add Item window, except that the item is already chosen.
Edit a Return Line🔗
SHIPPED.
-
Open the Outbound Return you want to edit.
-
Tap on the line you want to edit. An identical window to
Add Itemappears. At this stage you can:- Edit quantity to return for each batch
- Click
Next stepto view/adjust the reasons and comments
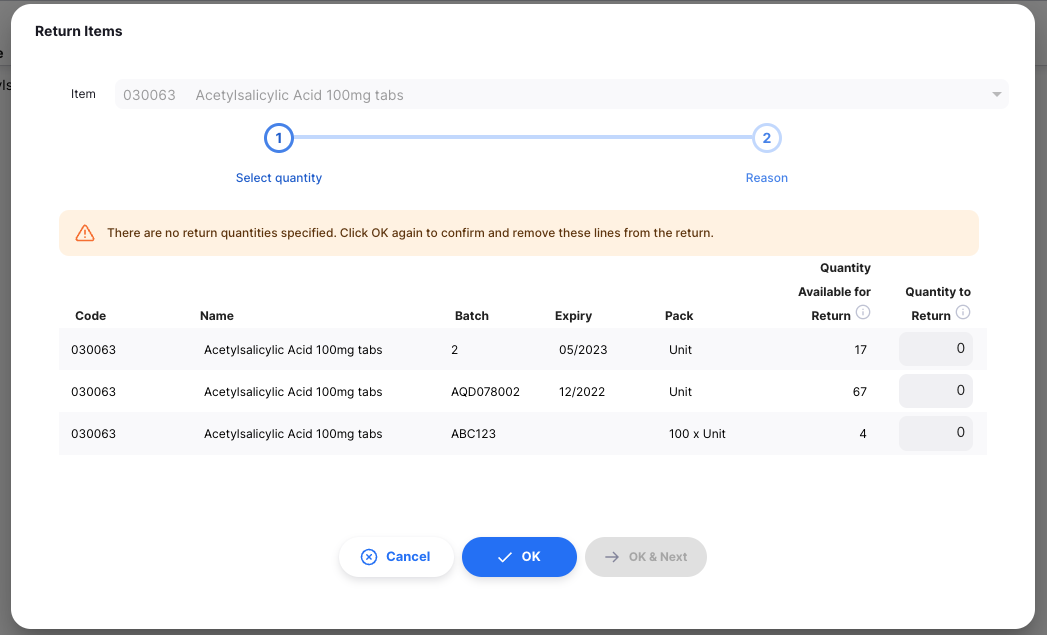
If you set the Quantity to Return to 0, that line will be removed from the return.
If you set all return quantities to 0, and click Next step you will see this warning message. It is informing you that no return quantities were provided; from here you can click OK again to confirm, in which case the window will close and all lines for that item will be removed.
Delete a Return Line🔗
- Open the Outbound Return you want to edit.
- Select the line(s) you want to delete by checking the box(es) on the right of the list.
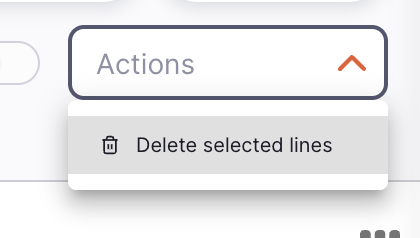
- Go to the
Actionsdropdown menu (top right corner, above the list) - Select the action
Delete selected lines
Processing an Outbound Return🔗
Confirming Outbound Return picking🔗
Picking refers to the process where individual items are picked from a fulfilment facility (usually a warehouse or a pharmacy store).
Once a return has been created, the next step is to go get the items to prepare the actual return. To help with that, you are able to generate a pick slip document. A pick slip indicates:
- The items to be picked
- The quantity and batch numbers for each item
- If you manage your inventory with storage locations, where the items are located
Once all items are picked and packed. You can then confirm the picking of the return to indicate that it is ready to be dispatched.
To confirm that a return has been picked, tap on the Confirm Picked button.
Once picking is confirmed:
- Return status is now
PICKED - Goods are no longer part of your inventory
- You are now invited to confirm the shipping via the
Confirm Shippedbutton - If your supplier is also using mSupply, then an Inbound Return has been generated and is now visible to your supplier
At this stage, you are still able to edit return lines, to add items or to delete existing lines. However, if picking has been confirmed, you need to make sure to inform your fulfilment facility of any change so they can make sure that the return is still correct.
Confirming the Outbound Return shipping🔗
The last step to return stock with an Outbound Return is to confirm that stock has been shipped.
To confirm that an Outbound Return has been shipped, tap on the Confirm Shipped button.
Once shipping has been confirmed:
- Return status is now
SHIPPED - You can no longer edit return lines
- You can no longer delete the return
- Your supplier is able to mark the return as
DELIVEREDonce they receive the return
Tracking Progress of Outbound Returns🔗
If your supplier is also using mSupply, you will be able to see when they receive your returns:
- status will become
DELIVEREDwhen goods are received: your supplier confirmed that they received your return - status will become
VERIFIEDwhen the return has been verified by your supplier. Goods are now a part of their inventory.
Viewing an Outbound Return🔗
When viewing a specific return, you can view the batches on that return grouped by item or with each batch listed separately.
To change the view mode, click the Group by item switch.
When grouped by item, you can expand the item to see individual batches, or use the expand in the table header to expand all grouped rows. If you click on an item you will also see all selected batches, as shown in this example:
If you do not have enough room on your screen, or simply aren't interested in some of the columns shown, you have the option of hiding which columns are shown in this view.
Click on the Show / hide columns button which is at the top right of the table. This gives a list of the columns available - you can check the columns you want to see. The options chosen are stored for the current browser, so next time you view an Outbound Return, you will see the selected columns only. If you have chosen which columns to show, then the button is shown in blue to remind you that there are more columns available.